
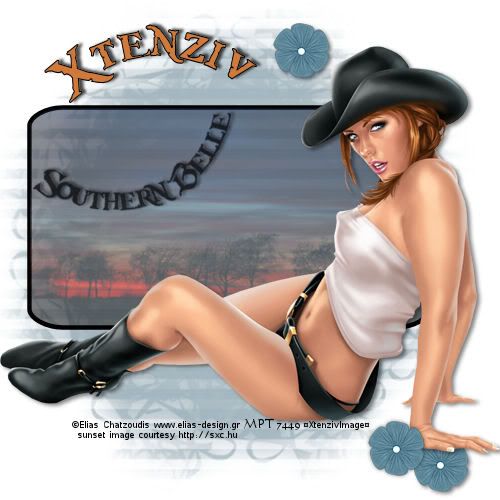
I am using an Elias Chatzoudis Image, beautiful artwork you'll need a
licence to use which can be purchased from
My Psp Tubes
Font: Caribbean Island
(Just having .TTF open and minimized on your task bar will allow PsP to detect font without you having to install it.)
ScrapElement: By XtenzivImage, using CU scripts by BlueBird Thank You.
HERE
Mask is called Mask-Swirl but i am unsure of where it's from.
If this mask is yours please let me know and i will either, remove it from my supplies or give you credit.
Right click and save this file into your masks folder.
Sunset Image courtesy http://sxc.hu don't forget to include them in your credits.
This Tutorial was created using Corel's Paint Shop Pro® with the understanding
that you have a working knowledge of this program.
(I used PhotoX2 but you should have no trouble recreating it
with earlier versions of PSP)
Open a new image 500 X 500 transparent and flood fill white
Add new layer flood fill with #a4b6bf
apply mask swirl, source luminance, show all mask, fit to layer.
right click mask in layer pallet, merge group to layer below Yes.
Make sure your forground is set to black, and background
null.
Somewhere in the middle of the canvas,draw out a rectangle approx 400 X 22o
Using preset shape, rounded rectangle. Anti-alias and create as vector checked.
Select your magic wand, then click inside rectangle layer to make a selection,leaving it selected
Add a new layer, then selections, modify, expand by 2
Open sxc.hu6 and copy, return to tag image and paste into selection drop opacity of this layer down to 50%
This time in the middle of the canvas, draw an Elipse circle approx 230 X 240
Using preset shape, Elipse. Anti-alias and create as vector checked.
Duplicate the vector circle rename copy layer belle and in the layers pallette X out the "belle" layer's visability.
Click text tool and move it over your vector shape until the A has a rounded line under it
click to add text, write out your name i used Caribbean Island size 54.
I used a color from her hair and black as stoke color add a drop shadow.
Once satisfied click on the + sign on the vector layer it will show your text and circle layers seperately, X out circle layer,
click on layer pallet and convert to raster layer then move name to left side above your rectangle frame.
Un X your belle layer and click on layer so vector shape activates, now click on pen tool, move tool over the bottom node on your vector shape right click on node,
Edit > reverse path, then select your text tool again move over vector shape until curved line appears under A type out "Southern Belle"
using Caribbean Island size 36 color Black.
Once satisfied again click on + sign and X out circle layer, right click and convert to raster layer.
Free rotate layer right by 40 move into frame. add drop shadow and reduce layer opacity to 75%
Add your Main Tube add a drop shadow im using V=2 H=3 opacity 50 and blurr 6
Open Belle6PetalXtenziv.png copy to canvas resize by 20% and duplicate flower twice and move them around tag until your happy with placement add a drop shadow to each flower.
Add all your copyrights, license and taggers mark if any.
Merge All Flatten and your done.
GREAT JOB!
THANK YOU
SO MUCH FOR TRYING MY TUT!
This tutorial is my own creation. Any similarity to any other tut is coincidental and completely unintentional.
Please do not copy it, upload it to another website.
You may share the link to the blog or the tutorial page directly.
☼XtenzivImage☼ ©2009 -All artwork used remains the copyright of the creators

No comments:
Post a Comment